|
Build a Natural Stone Patio Yourself,Like we built in our Secret Garden, for under $100.00Read this page to find out how to build a natural stone patio, for less than $100.00 We built a stone patio in our secret garden in our backyard. We only purchased the class I sand, pea gravel and edging. One great thing about a project like this is- you can always add to it and make larger if space permits.
We made the walkway first, then later made the patio.The finished product looked the same. We did the entire secret garden in stages over 2 years. The size of our stone patio is approx 8ft x 8 ft not including the curved walkway. 8 x 8 is 64 square ft. After adding the curved walkway it is approx 125 square feet. We connected the patio to a walkway made out of the same materials. See the second photo below. Natural stone is so beautiful and looks great in a garden area.
When you build your new patio area you may need to purchase new patio furniture. Protect your new outdoor furniture with covers. Check out the selection below.
You will need new furniture for your natural stone patio, check out the link below for Chaise Lounges so you can really relax. There are also indoor chaises too. So relax in comfort after a project is complete!
Find our more about our secret garden that contains this natural stone patio here. 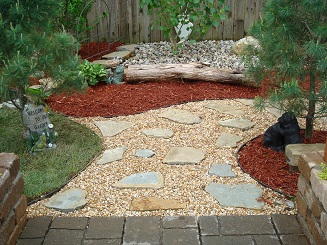
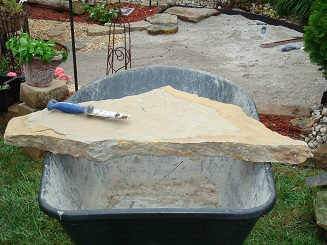
As you can see from the above photo the large stones are placed farther apart in the walkway going around the tree than in the actual patio area. The reason for this is - in order to have a secure footing for furniture the stones need to be closer together. Walkways are for stepping, so they can use less large stones. Just make sure you place them so they are comfortable and safe for walking. This is How to Build your Natural Stone PatioThis is how we did it. Gather the stone you want to use. We collected our stones from different locations including, beside roadways, and construction sites. If you collect your stone for your patio yourself get stones that are at least 3 inches thick and as flat as possible. We collected alot of stone from a roadside. The stone had fallen from the hillside. It was in the ditch. Natural Stone is very heavy, so be prepared for some heavy lifting. (This is a good job for a few strong young men. (I have 2 sons). We used our utility trailer to haul all materials ourselves. You can get alot of use out of a utility trailer. We no longer have a pickup truck. We could not do the projects we do around our home without our trailer. If you do alot of DIY projects around home I strongly suggest a trailer. You can buy one used. A Great place to look for a trailer is Craigslist.org. That is where we purchased ours - Cheap! It paid for itself in a few months. No more delivery fees for materials.
You can also purchase stone from landscape suppliers, but this will raise the price of the project extensively.
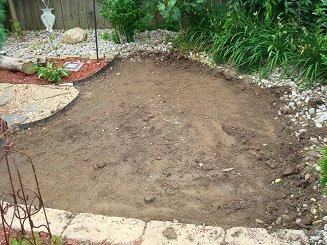
Prepare the Site for the Stone Patio.Start by stripping any grass or landscaping down to the bare dirt. Use a shovel, or spray with a chemical to kill the grass. We had burlap placed over the area for a while before we built the natural stone patio. The burlap was held in place with paver stones. This was to reduce the amount of mud in the area after removing the sod. We did not start on the patio immediately after completing the other areas in the secret garden The picture below shows that weeds had started to grow back into the area.
The photo above shows the patio area cleaned up. We painted a yellow line around the area to determine the outside edge. It has been removed during cleanup. As you can see in the photo, the ground is below the surrounding existing landscaping. We removed all weeds and grass with shovels.
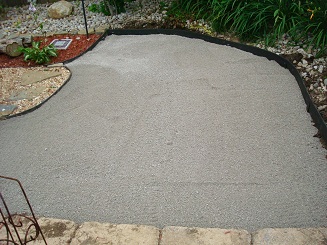
After the area is cleaned up you are ready to start building the patio. Place your edging around the area, to secure the next material.
Then put 3 to 4 inches of class I sand, which can be purchased at a rock quarry. Class I Sand is sold by the ton, so use a truck or trailer. We used approx 1/2 ton of class I sand for our project.
Or have it delivered. But if you do(note this will add to the cost of the project).
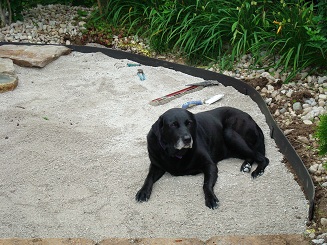
The photo below shows our Project manager CJ, inspecting the job site during construction.
After you add the class I sand, level it with a rake or shovel, then spray it down with a water hose several times to achieve compaction. The more the sand gets wet the more solid it becomes. Class I sand is a good base material. It is also used under paver stone patio projects.
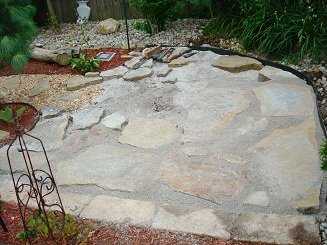
Now it is time to add the natural stone. Use a wheelbarrow to move the stone to the patio area. Save your back as much as possible on projects like this one. Place the stones in the desired pattern you want. Leave a few inches of space between the stones. The photo below shows the stones in place, before washing them with a water hose.
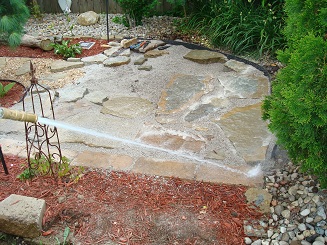
This photo below shows the stone getting washed with a water hose to clear off sand.
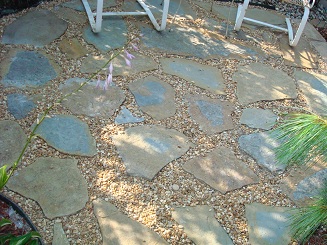
Place pea gravel between the stones. This gives the natural stone patio a beautiful finished look. Pea gravel can be purchased by the bag, or in bulk. We bought it by the bag for this project. To goes pretty far in a project like this when using the sand base. The patio has been built over a year now. The stones are still in the same location as they were originally placed. Furniture fits great on the flat stones. A natural stone border, using smaller rocks would also look nice with this patio. It could be placed any way you want to place it. In our project we already had existing landscaping surrounded by white stone and we wanted to keep the stones separated from the patio area. If you have a grass edge, I would suggest natural stone as a border. We have used lots of natural stone as edging in our landscape and we love it.
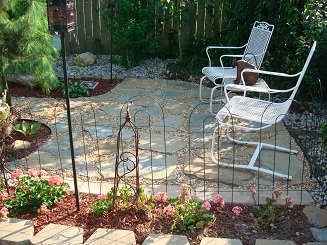
Build a natural stone patio in your garden or landscaping and save lots of money over using paver stones. If you build the patio yourself you will save hundreds of dollars on labor. Depending on the size of the natural stone patio you build, you could save thousands of dollars on labor costs by building it yourself. Place comfortable easy maintenance outdoor furniture on the patio and enjoy your new outdoor space. We sure do enjoy ours. Tip- Build your new stone patio in an area that provides a great view of your garden. This will enhance your enjoyment of the area. When you complete your new patio - Then it is time to Party on the Patio!
Place low maintenance outdoor furniture in the patio. We use wrought iron furniture in our stone patio in our secret garden. Decorate the patio area with items you love.
Find the new
patio furniture to go with
your natural stone patio.
|
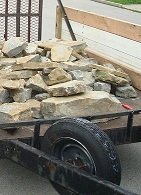 The photo on the left shows our utility trailer loaded with natural stones.
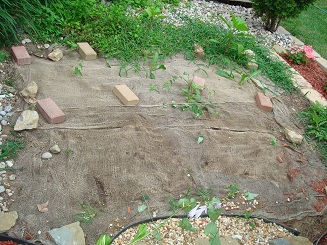


Check Our "Weekly Specials" featured here
Shop for Outdoor Cooking Gear for Home and Camping

Are You Hungry Yet?


Camping, and Outdoor Gear

Napoleon Apollo 3 'n 1 Smoker, Tailgate/Charcoal Grill and Water Smoker

Napoleon - Grills - For the hardcore grillers there is nothing much that can compare to the flavor that food gets from being grilled, especially when it comes from a smoker grill.
But whether you are a hardcore griller or someone who occasionally likes to try something different, the Apollo Smoker provides a multitude of options making it a perfect addition to your outdoor cooking tools.
The Apollo 3 'n1 Smoker, Tailgate/Charcoal Grill and Water Smoker provides you with three different grilling options each with multiple vents allowing you to control the heat as required.
3 'n 1 Apollo Smoker Grill for wet and dry smoking and also a stand alone charcoal grill with lid Sturdy lid handle ACCU-PROBE temperature gauge on the grill lid Multi-vents for excellent temperature control Upper lid contains a horizontal bar with 5 meat hooks for hanging fish, ribs or sausages.
Temperature eyelets at each grill level provide access for inserting a thermometer probe Each cooking chamber (stacker) contains a 20 cooking grate Hinged, tightly fitting doors, with easy access to the water pan and charcoal basket Folding handles enable ease of transport and storage 3 sturdy legs.
Enjoy Steaks, Seafood and More while you enjoy being outside in your backyard around your firepit, or outdoor rooms.
This is also a great gift idea!
Outdoor Entertaining, What A Great Idea!
Create your great escape at a price you can afford. Backyard X-Scapes is a leading online retailer of backyard products, bamboo, water fountains, planters and pottery, and tropical decor.
