|
Shade Garden Ideas for Your LandscapeCreate a Shade Garden in the area of your yard that does not get full sun. This garden we are creating also has another issue that has to be dealt with-
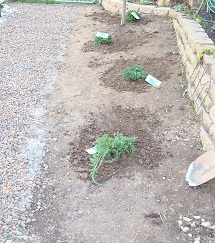
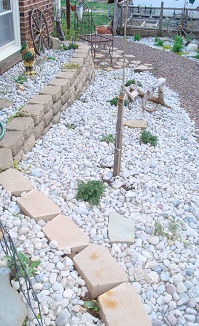
Our dogs love this space, and are destroying our existing planter. We have to put a stop to this, when we build our new shade garden. The photo below shows the area before it was turned into a shade garden, when it is a side yard.
Shop for Everything you need for YOUR Garden at our Garden Supply Store Recommended Products to Learn more about Shade Gardens
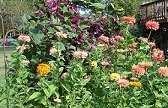
The photo Above shows the shade garden after we finished it, keep reading to get all of the details of this project-as it becomes alot more interesting than a unused side yard. The next photos show the details of the shade garden during constuction. There are more photos of the finised project at the bottom of the page. But, you are going to want to read the details and see how you can create a garden in a shaded area but using existing plants and transplants you already have. The entire last stage of this project, which is the shade garden, plants and grown cover cost about $100.00. So get inspired to get your hands dirty and build a shade garden now! 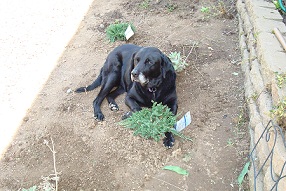
See one of our kanine crew chiefs CJ in this photo, as you can see she looks comfortable! This is after we had removed the sod and starting planting new plants in the area. Our other dog is the one that decided to turn our planter into a sofa. I already have one shade garden, it is my Secret Garden located at the back of our property. But when given an opportunity to make another shade garden, I am always ready!
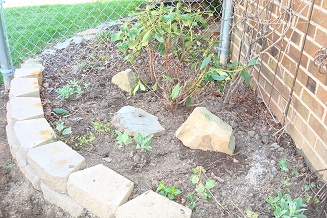
We have an area on one end of our property that used to be an unused side yard. Last year we extended our fence that divided our back yard from our side yard, to include the side yard as part of the back yard. We removed the sod next to the fence line and made a cottage garden and a stone covered path. The cottage garden gets sun, but the area up close to the house and deck is more shaded. We already had a planter built onto the side of the house with plants, planted. And they grew well in the planter, until our dog decided to make a bed out of the planter! This is not good for the plants of course. He did this over the winter months when he was outside and got bored alone during the day. The year before he could not get into the planter because it was outside the fenced area. (This is our Thank you, from him for improving his view of the street I guess!)
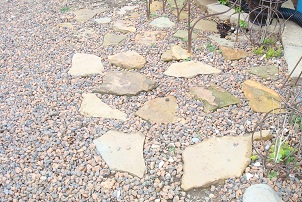
We have also made a small stone patio on one end of the area, which was filled with top soil, that the dogs- damaged from digging. It turned out nice, so that was ok.
But we DO have to stop the reoccurring damage from the dogs! We have a plan for that too.
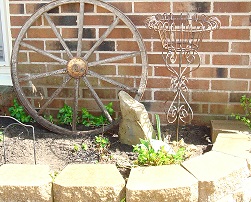
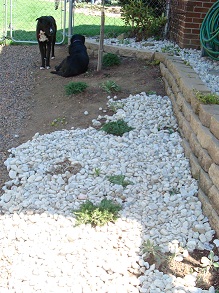
Repairing the Damaged PlanterNow it was time to make the repairs to the planter. If you notice in the photos you can see that the planter is on a slope. It is deeper on one end. On the shallow end there is a curved section added on. It also had alot of damage. We moved the rhododenron back away from the border and added some lambs ear and large stones to the area. The dog's have damaged the rhododenron alot, it had to be trimmed back. This planter willhave river rock as a ground cover when finished.
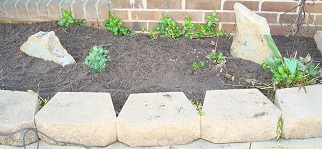
We cleaned up the planter, split the hosta and made it into 2 and added another sedum, and added more top soil. I had some mums in the area but could not find any sign of them. They may pop thru later, but overall I feel that we got the area back into good condition.
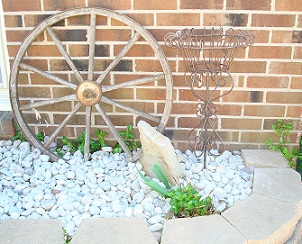
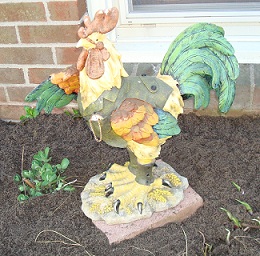
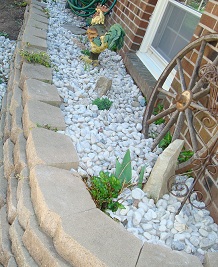
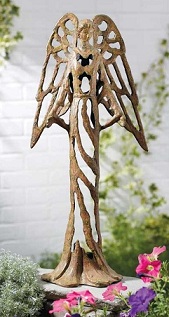
As you can see in the photo I have added a wagon wheel, a wrought iron planter and a rooster to the planter.
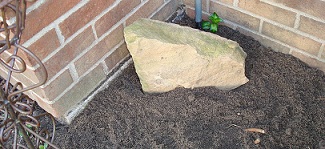
I have also added several large stones to the area, to make it undesirable to the dogs. The planter will be covered with stone like the area next to the fence. The large stones also add interest to the area while the plants are growing in.
Here is a tip for you - remove sod when it is wet, it makes the ground easier to work. Use a curved end shovel, if you are doing it by hand. You can wet the sod down with a hose if it is dry. But, a good time to do it is after a night of rain.
Now the remaining sod has been removed to make- yet another
We have plans for at least 4 more this year! Obviously I love beautiful landscaping and take full advantage of saved flower seeds that I collect each year as I dead head my perennials flowers and annuals flowers You can get lots of ideas about gardening and see lots of photos of My Gardens here. To me one of the best things about gardening is creating Free Gardens from dividing flowers, and starting from seed. I also do alot of transplanting flowers as needed. The Sod is all Gone!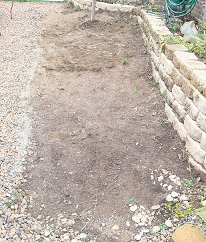
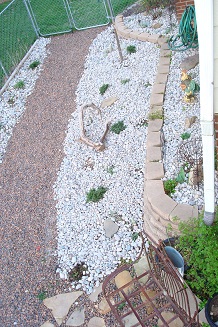
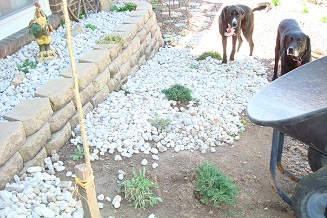
As you can see in the photos above the sod is all gone now. That is the hardest part about making a new flower bed. Did you notice the narrow pathway in the grass. That is the path made by the dogs because they don't like walking on the stone pathway. We are going to put rock in this area when it is finished, so hopefully they will avoid it too. They have a large grassed area in other parts of the yard. The discarded sod will go into another part of our yard as fill. If you happen to have a location in your yard that needs to be filled you can use this material for filling in low spots, as long as the grass being attached to the dirt is not a problem. This would also be good in a compost bin , with alot of the dirt removed. That is something else we are planning on adding to our to do list soon. With the sod gone it is time to design a layout of plants to place in the new shade garden. I mentioned that I transplant and divide alot of plants. That is my plan for this garden too. But since the dogs travel in this area I am also going to add some low growing evergreens that I feel are rugged enough to take some abuse from the dogs. I purchased 6 blue rug junipers. I placed 4 in the shade garden and 2 across the pathway closer to the fence. I am doing this to give a common plant to both gardens.
This stone pathway is curved (which I prefer) but I want some plants growing into it. These junipers are slow growing so it won't happen soon, but when it does it is a nice look. They also are not for full shade, but the pathway out front is partially shaded by our Bradford Pear tree so I am not concerned about them in this location.
The area they are in gets afternoon sun. The planter against the house is the one that gets less sun and I am not planting them inside of it.
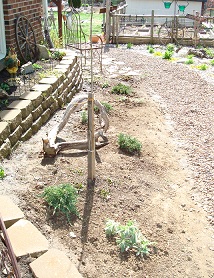
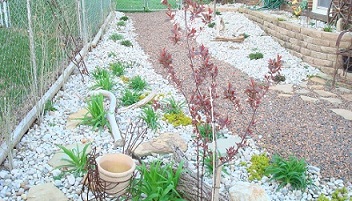
This photo shows the new planter with more plants in it. I have split some lambs ear from a garden in the front yard and added it to the new shade garden. I am also adding creeping Jenny, from another garden, and some blanket flowers and black eyed Susan that I started from seed. I am hoping that there is enough sunlight in this area for them to do ok. If not I can always move them later. This way the planter will have some more color. (Not in this photo).I have also added some chocolate ground cover,(purple color). I plan on adding some correl bells when I split them too. I added 3 blanket flowers to the opposite side of the garden too. Again so they have some common plants. I will probably add some black eyed Susan too. We have the stone that will be the ground cover, now it has to be placed in the planters.
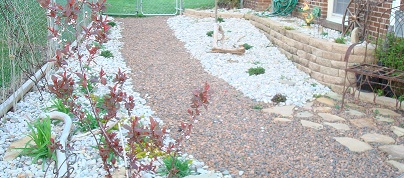
The finished Shade Garden with the Stone Ground Cover!What a difference a grown cover can make. The addition of color and texture really makes all of the natural landscape decor pop. The large stones, cedar branch and rooster and wagon wheel, along with the wrought iron planter Really shows up nice.
When the planter feels in with plants it is going to be very nice. There will be color from the Hibiscus, sedum and hosta in the long planter along with the verigated vine. The area in front of the planter is now finished too and I lvoe the way it turned out. Here are some photos as it was being completed.
The goal is that they won't find the stone comfortable to lay in or to dig into and they won't be destructive. The placement of larger stones makes for smaller areas so it is not easy to lay down in the space. We have lots of nice grassy areas where they can rest in other parts of the yard.
The stone was purchased in bulk at a local landscape supplier where we shop. Landscaper's Corner is a great place to shop for bulk landscape supplies. Check out their website at the link above. The cost of a yard of large river rock is under 50.00 and it covered the planter and the shade garden in front of it. The pathway is ken- lite stone we put it in the pathway last fall. It was completed when we made the stone patio. That was also 1 yard around $60.00. We bought 1 yard for the other side of the path where the cottage garden and day lily garden are. So the total was 3 yards, purchased 1 yard at a time. This area is approximately 14 feet wide by 32 feet long. And it used to just be an unused side year covered in grass. Total cost for new plants and stone for the shade garden less than $100.00. This is because I used transplants and divisons of existing perennials instead of buying all new plants. I have been planting this property for over 4 years and the first 2 years I purchased alot of plants. Now I am getting to enjoy the savings by dividing plants and starting new plants from seed. Look the website over for full details on how you can do that too.
These photos show the area as I see it from the deck above. And from my
raised bed garden
next to the day lily garden.
So, hopefully this shade garden project inspires you to turn an unusued space in your yard into a show place. Get more ideas when you take a tour of my gardens.
|

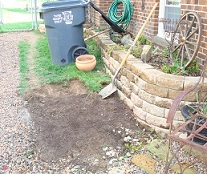 So we have decided to make a new garden in front of the planter when we redo the existing planter.
 On the long planter, we have 2 perennial hibiscus planted in the planter, one on either end. The hibiscus' was split and transplanted to this area last year and the 2 plants were beautiful. The one closest to the fence was dug into by our dog,Bronco, and I hope it survived. They seem to be pretty hardy.
 So the planter now has 2 hostas, 2 sedum, 2 hibiscus and various vinca vine. The vine grows over the side during the spring and summer. It is caut back now.
 I have some of the evergreens like these on each side of my front walkway too and they are spreading to help break up the straight lines of the sidewalk there, and that is what I want them to do here too.
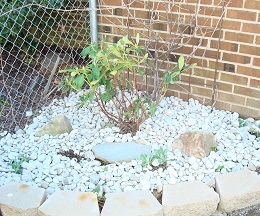


Garden Books

Shop for Home and Garden Decor Items Rented Mule Home and Garden Store
Garden Tools
Shop for Scrappy Signs for Your Garden Here

Greenhouses
Flower Seeds for your Garden
Shop for Flower Seeds, From Freda's Favorite Flowers- From My Private Garden here