|
Find out How to Build a Pergola that will Double as a Porch Swing Support.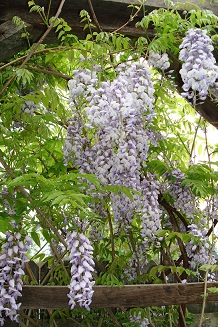
Shop for your Backyard At Our Backyard Living Store
Find out how to build a pergola on your property. We built this pergola out of reclaimed antique barnwood. We chose this type of wood because we have an abundance of barnwood because we removed barns in the past. This barnwood also blends with other backyard projects we have done before, and have planned for the future. Keep reading to find out more! See this link for OTHER Pergola plans HERE!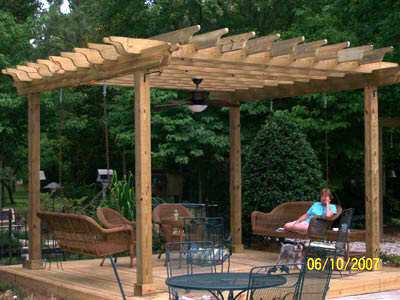
Click Here! to Find out "How to build a pergola this weekend even if you have never built anything before—and save thousands of dollars doing it?"
Do you want to save 40%, 50% or 70% over hiring a contractor?
Recommended Reading about Pergolas and Garden Structures
A pergola like the one we have, would be a perfect place to hang windchimes. Checkout the link above to see lots of windchimes to choose from.
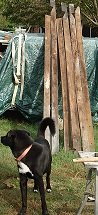
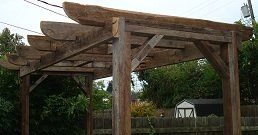
You can build a pergola using any type of wood you have available. The Photo above shows the pergola when it is about 90 percent finished. The top boards still have to be attached. They are loose in the picture. The wood used to build a pergola like this, was antique oak - aged and weathered to a beautiful brownish gray color. This photo shows the wood that was used to make the 4 posts for the pergola. The wood shown is 2x4's before they were cut to length to make the post for the pergola.
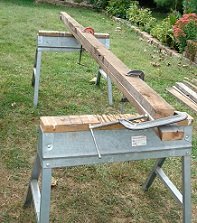
Full details on how to build a pergola like this one are enclosed on this page. This photo left, below- shows 2 post being attached to each other to make 1 large beam. Any curves in the wood were eliminated by clamping and nailing the beams together. The beams were cut down to 10 feet. That was the length needed to build a pergola the size we need.
Below are the measurements needed to build a pergola like the one we have featured here.
Alternatives to building your own Pergola include buying a kit.Here are some Suggestions on Pergola Kits
The Craftsman Style features add a custom touch and suggest use as an entry or gateway. This Arbor and Trellis has a fine architectural look at a very modest price.Click on the photo of the pergola for more details
Back to the Pergola We Built Out of Reclaimed Barnwood
Overall dimensions for the pergola: 10 ft tall before the top was installed - 8 2x4's were doubled together to make 4 posts NOTE_ after placing the posts in the ground the height will be 8 feet tall before the top is installed. 10 feet wide outside 9ft 4 inches inside measurement 48 inches deep across (before the top is installed).
Depth of holes for the posts 2 feet Nails used 16d The 2x6 used to make the top are 6 ft long.
We used 6 pieces of 2x6 barnwood for the top
Recap of wood needed 8 2x4 for the posts. 10 ft long 2 2x6 for the cross beams on top 10 ft long 4 2x6 for the short ends of the top 4 ft long 4 2x4 cut on an angle 40 long for the angle braces at the top 6 2x6 pieces for the top boards 6 ft long TOOLS needed include - circular saw with a rough cut blade framing square pencil hammer tape measure 3 or 4 saw horses 4 ft level wheelbarrow duck bill shovel or post hole diggers 16d nails Jigsaw a lid from a 5 gal bucket (to make a curve for top beams) belt sander plastic bristle brush

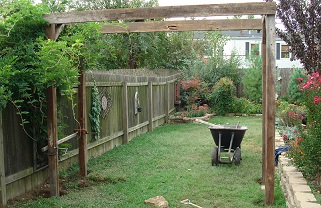
Our pergola project has 2 main purposes. So it has be big and sturdy. If you don't have the same needs, scale your pergola down to the size you need. We have a fast growing wisteria The wisteria vine has rapidly outgrown its support that is attached to the fence. The other purpose for this project is to build a frame to support our porch swing
Currently we cannot use our swing because there is apicnic table The new pergola will provide us with a great view some of our flower gardens So we are building a BIG pergola to take on all of it's duties.
This pergola design would also be perfect to support a hammock 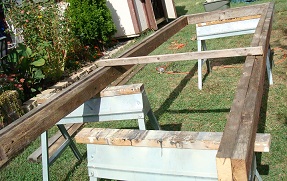
This photo left - shows one end of the pergola resting on sawhorses Build 2 ends exactly alike. Build them on the saw horses as shown in the photo to the left. Remove the first end and sit it aside, to build the other end. The next photo (right) shows the pergola upside down. The top base of the pergola was built and attached to the 2 ends. The top base is built out of 2x6 barnwood. If you build a pergola out of barnwood it is going to be very heavy. Have plenty of help available to move the pergola when you get it to this stage. Up to this point it was movable by 2 adults. The pergola has to be turned upright. This is done by lifting it up and tilting it up. We have it lined up to go to it's permanent location. You can see the fence on the right. The wisteria is growing up the side of the fence
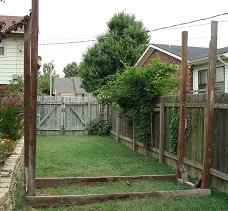
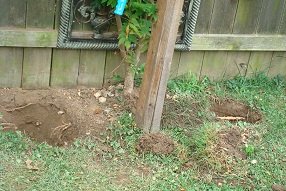
This photo shows the pergola standing upright. Notice that it is not secured by the 2 ft deep holes that it will be placed inside. The pergola standing upright after being lifted up, is within a foot of it's final location. Dig 4 holes, 2 ft deep each, to place the 4 posts of the pergola into.
See these photos showing the holes on either side of the pergola. Carefully place the pergola one end at a time into the 2ft deep holes and level the pergola. Filled the holes with concrete, to secure the pergola in place. Do Not leave a pergola placed on top of the ground. Make sure it is secured in place like this one is secured. Dig the hole 2 feet deep like we did. Use a duckbill shovel A pergola would be a safety hazard without being secured in place properly. 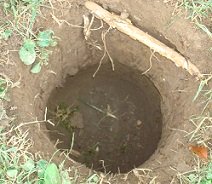
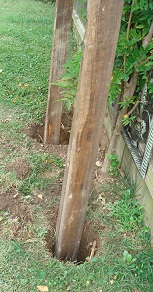

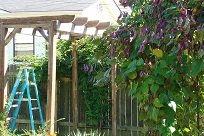
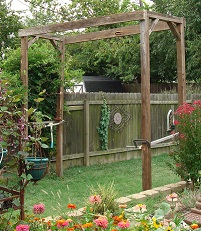
You can see the finished posts safely concreted in the ground in this photo (right). Make sure you have the structure level on all angles before it sets. Let this set up for at least 24 hours before you work on the structure. Make sure to allow enough time for the concrete to set up completely when you build a pergola. This photo shows the pergola in place. Notice how much better the height is now. The privacy fence is 6 feet tall. The wisteria is already towering over the fence in every direction. The pergola will be about 8ft 4 inches tall when it is finished. The wisteria will be attached to the finished pergola. After the top is attached and it is sealed with water sealer.
As the pergola sets up in place you can build the top.
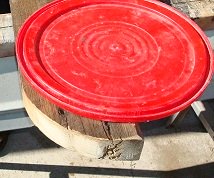
Cut 6 pieces of 2x6 lumber 6 ft long each. If you are purchasing new lumber - buy 12 ft length boards and cut them in half. This would save waste that would be lost on 8 foot boards. To make the curves on top of the pergola top use a lid from a 5 gallon plastic bucket. Draw the curve on the board. Make the curved cut using ajigsaw
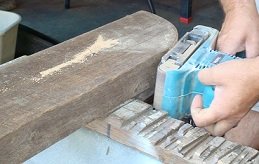
See the photo below to see details. Cut the notch about 1 1/2 inches deep. Make sure it is a good fit for the pergola frame. Space the top boards evenly. 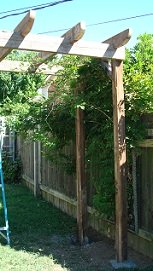
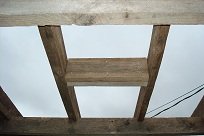
The notches on the top boards will make the entire structure much stronger. This photo on the left shows a close up view of the top end of the pergola. Notice that the 2x4 cross beams are doubled and the top has 2 boards cut on an angle.
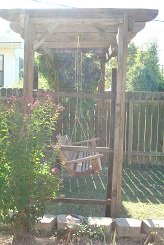
The photo above (left) shows the cross beams added to the top of the pergola that will be the porch swing support. If you add a swing to your pergola you will need to added these supports. They are 2x6 boards doubled nailed to the pergola top beams.
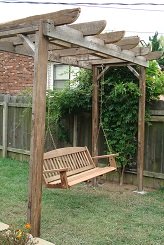
As you can see in the photo on the right the pergola has the swing on it.
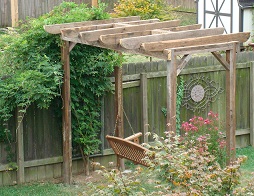
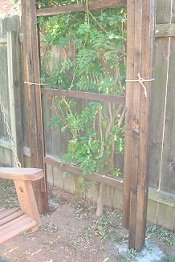
This - build a pergola project- is now finished and the wisteria is attached to the pergola. See photo of wisteria tied to the posts of the pergola. We trimmed the wisteria when it was being attached. The trellis is attached to both ends and water sealer
The bottom of the pergola around the posts will be landscaped to give it a finished look. That is all that is left to do! But we have already got to enjoy the swing and we know we are going to like it where it is now. You can Build a pergola like this on your property to add rustic charm and serve a needed purpose too. If you have a wisteria or other type of perennial vine growing that needs added support a pergola could be the answer. We love our landscaping and wanted to provide the wisteria with the support it needs to grow. The fence was not the intended support we had in mind when the wisteria seedling was planted.
As this build a pergola project moves forward it will become an extension of our back patio. Consider this when you build a pergola on your property- they can also provide shade for a patio. We are considering building a pergola over our patio on the back of our house. The patio area has a paver stone A large covered pergola would be ideal for the patio and to cover the outdoor kitchen I can just invision the vines and flowers growing on it as I write this!
Watch for upcoming details on those projects too!
With each project we complete it seems we are always adding to our to-do-list - instead of making it shorter!
|


SAVE MONEY WHEN YOUSHOP OUR SPECIALTY STORESFOR YOUR HEALTH & YOUR HOME AND GARDEN NEEDS
Moringa Pills, Powder and Tea, & Diet and Nutrition Products
Shop our Appliances and Electronics Store
Shop our Book Store, for Books and Magazines
Shop Our Furniture and Home Decor Store
Shop Our Garden Decor and for the Birds Store
Shop Our Kindle Store for Ereaders and Ebooks
Shop Our Backyard Living Store, for Firepits, Grills, Patio Furniture & more
Shop Our Halloween Store for Decorations and Costumes
Shop Our Home Improvement Store For Hardware
Shop Our Christmas Decorations Store
Shop Our Lighting Store For Inside and Out
Shop Our Home Improvement Store For Tools & Building Supplies
Shop for Your Basement Rec Room, Bars , Tools and Accessories